Conversion Profiles – Creating and Editing in Document Conversion Service
When converting files using the Command Line Tools and the .NET Conversion Utility library, we use a conversion profile to describe the type of output you want to create.
What is a Conversion Profile?
A conversion profile consists of a collection of settings stored as key (or name) and value pairs. These key-value pairs include settings for image resolution, choosing color, greyscale, or black and white images, saving the output as multi-page or serialized files, and many other options. The Conversion Settings section of the User Guide lists all available key-value settings for conversion profiles.
Document Conversion Service (DCS for short) has a comprehensive collection of pre-configured profiles to get you started. We have profiles for creating searchable PDF files, PDF A-1b PDF files, and TIFF and JPEG images of various resolutions and colors. We also have a selection of conversion profiles for eDiscovery options for Office documents.
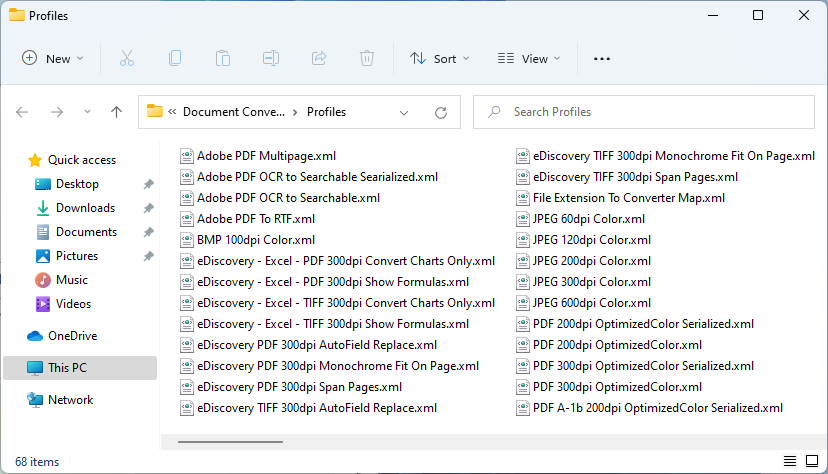
You can see all of the profiles from the DCS Dashboard. On the main screen, click the Desktop Conversion tile, then click the Open Profiles Folder tile.

A file explorer window will open that lists all conversion profiles. As you can see, there are a lot of profiles to create different file types or perform different image operations.
Conversion Profiles – Creating New Ones
The fastest way to create a new profile is to copy one of the pre-configured profiles closest to your needs and then modify its settings.
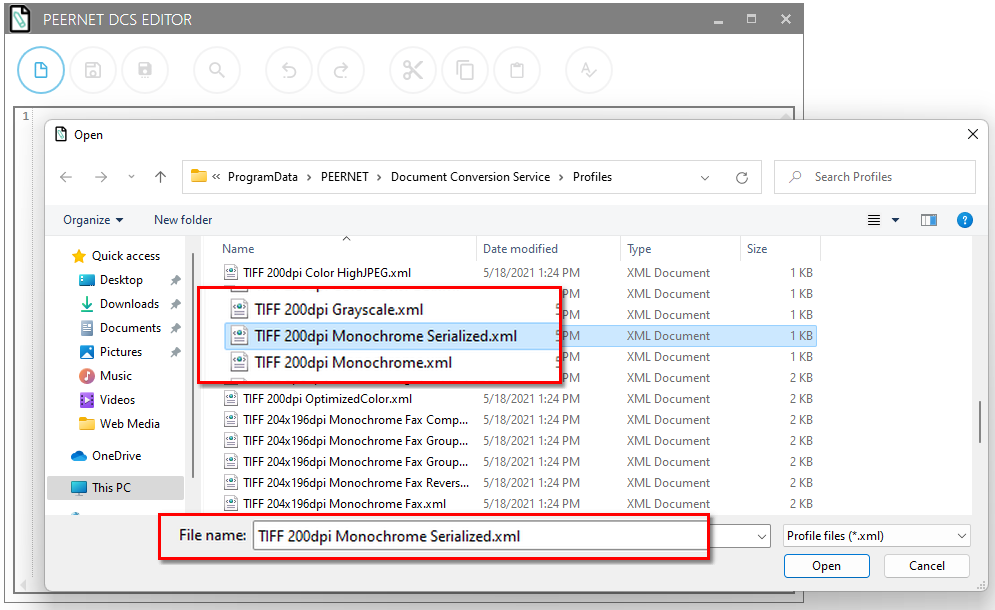
For example, to create a new profile that outputs serialized black and white TIFF images at 150 DPI, we can start by copying the existing TIFF 200dpi Monochrome Serialized profile.
From the DCS Dashboard, go to Desktop Conversion and click the Edit Profiles tile. The PEERNET DCS Editor opens and prompts you to choose a profile. Find the TIFF 200dpi Monochrome Serialized profile in the list and open it.
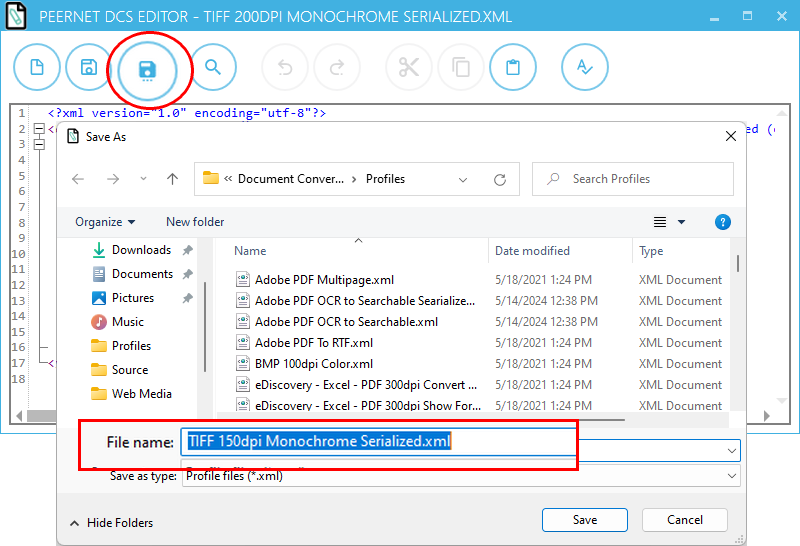
First, use the Save As button to rename and save this profile. Here, we have renamed the profile to TIFF 150dpi Monochrome Serialized.
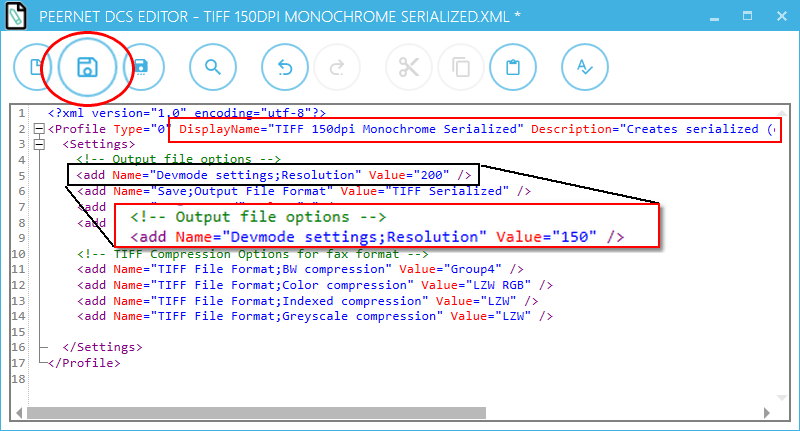
Next, change the Resolution setting from 200 to 150. You may also want to update the DisplayName and Description stored at the top of the profile.
When finished editing, use the Save button in the upper left to save your changes.
Conversion Profiles – Testing Using Drop Converter
You can now verify and test your new profile using the Drop Files Converter app included with DCS.
Before we can test, make sure that the DCS service is running. You can start and stop DCS from the widget at the top of the Dashboard. Click the green play icon next to DCS Service if the Status here does not state Running. Once the service has started, we can test our profile.

Next, return to the Desktop Conversion Utilities section in the Dashboard. Click the Convert Files and Folders tile to open the Drop Files Converter app.
Change the conversion profile from the default of TIFF 300dpi OptimizedColor to our new profile, TIFF 150dpi Monochrome Serialized.
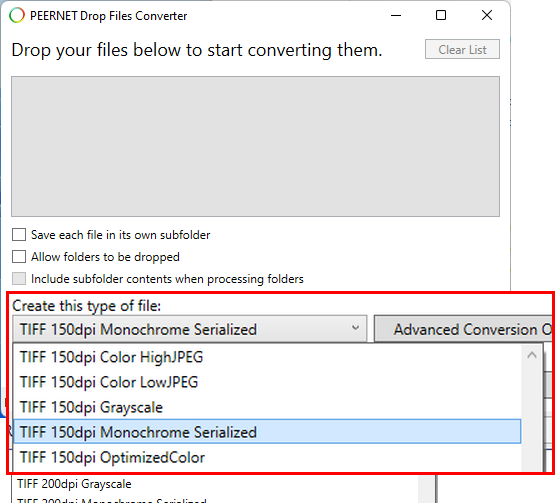
Then, drag & drop any files you want to convert into the grey box at the top. Files will immediately begin converting.

Once you have confirmed that your new conversion profile creates the output file you want, you can integrate your profile into your automated workflow using our command line tools or .NET library utility.
Watch more Document Conversion Service Tutorials
More Tutorials
Creating and Editing Conversion Profiles
Troubleshooting with the Logging Console
Activate License


